| It's the substance that one scatters on the cage floor. In a mammal's cage it's called bedding, acts as an absorbent for urine, may contribute a pleasant smell to the cage and it looks nice for the spectators. In a tarantula's cage the substrate's principal purpose is to give the tarantula something a little less hostile than hard, sterile glass or plastic to stand on; in some situations it may help to maintain proper humidity; and it looks nice for the spectators. A few tarantulas require a thick enough layer of substrate to allow a burrow, another use for substrate. |
| (Quoted from the Tarantula Keeper's Guide, Third Edition.) |
As of this writing, the most commonly used substrates are horticultural peat and shredded coconut husk, and the debate rages on endlessly over which is better. Both have their advantages and their disadvantages. Both work well and the newbie is strongly advised to use only one or the other of these two until at least a full year's experience has been gained in caring for the tarantula. As you read this, your goal should be to learn how to properly care for your pet. Leave the experimenting to those who have the experience to properly assess the results.
This is a dark brown to black, somewhat fluffy, soil-like material. Basically, it's naturally composted moss and leaves from the bottom of special types of swamps called peat bogs.
Alternate names for it are black peat, brown peat, Canadian peat, and peat moss (although "peat moss" is also sometimes used for dried sphagnum moss). It's available in smaller packages from houseplant and garden departments in department stores, and in larger packages and bails from commercial landscaping, gardening and horticulture suppliers. A few enlightened pet shops also sell it.
When eventually tamped into a solid pad on the cage bottom, peat will occupy only about half the volume it does as it comes out of the package. Therefore, start out with at least twice as much as you might otherwise think you'll need. Add about 1 quart (1 liter) of room temperature tap water per 4 quarts (4 liters) of peat. Mix it well. Grab a handful and squeeze it as hard as you can. When you open your hand, if the peat retains the shape of the inside of your fist quite well, you're about finished. If it easily falls apart, add a little more water, mix and test again. If it's so wet that you can squeeze water out, mix in more dry peat. Don't become pathologically obsessed with the amount of moisture in the peat, there's a wide margin for error and it's all going to dry up in a few days anyway. The only reason we want it slightly damp is so we can tamp it into a firm pad on the cage floor. Tarantulas don't like to stand on loose or fluffy substrate, preferring a firm base. (See Why Does My Tarantula Hang... below.)
If the peat comes from the package in large or hard and unmanageable lumps, or seems to have an excess of sticks or other detritus mixed in, you should make some effort to sift it before using it. If the lumps are too hard you may have to add a little water first and let it stand for several hours before sifting it. Use an inexpensive French fry basket as a sieve.
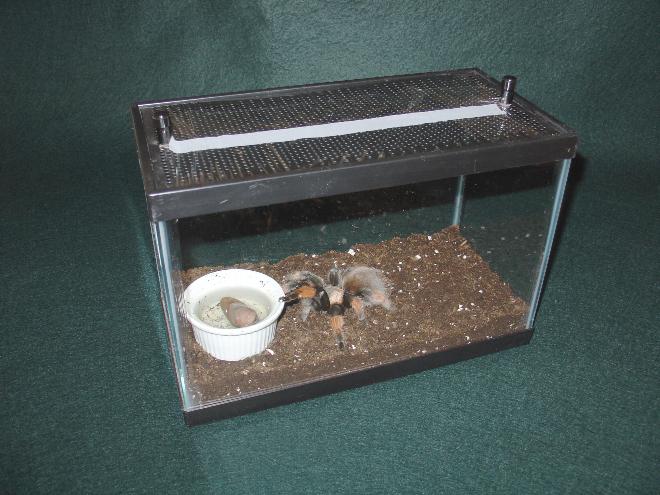
Now pack the peat into a pad on the bottom of the tarantula's cage. Pack it quite solidly. In the end you want a pad that's an inch or slightly more (~3 cm) thick. If you allow ample ventilation (without compromising the cover's primary purpose of preventing the tarantula's escape) the moisture will evaporate from the peat in a few days. This is good because we keep almost all tarantulas in dry cages.
Install a water dish with the obligatory rock or slate chip and add one tarantula. Don't try to feed it for at least a week to give it a chance to get used to its new home before it's stampeded by a herd of wild crickets. (No, your tarantula won't starve. Tarantulas require months to starve to death. The record fast seems to be about 3 years!)
This is available under a variety of trade names from most pet shops in the form of small, dried, compressed bricks, and from many landscaping, gardening and horticulture centers in the form of much larger bricks and bails of dried, compressed pellets. It is also sometimes called "coir," variously pronounced "kwar" or "choir" in the hobby.
Processing the shredded coconut husk is often a bit problematical the first time you use it. Do not let this discourage you. As you process it, compressed, shredded coconut husk will increase in volume by a factor of six to eight times its original, compressed volume. If you are using a compressed brick you can cut off a piece of appropriate size with a small handsaw. If you're using the pellets, merely select a mass of pellets of adequate volume. It is better to process a little more than you'll need than to process too little. Be generous. Any unused, expanded shredded coconut husk can be dried out and stored until the next time you clean cages.
The next step is to soak the lump or pellets of shredded coconut husk in room temperature or slightly warmer tap water. Use three to four times the coconut husk's volume in water and allow it to soak several hours in any convenient container - a bucket for instance. Remember that it's going to increase in bulk as it absorbs the water!
If you use a lot of water it will expand and loosen relatively quickly, but you'll then have to wring out the excess water before using it. To do this use a cloth bag of some sort. Pillow cases and cloth (but NOT mesh) laundry bags work well. Warning: because of the staining of the fabric and a lingering odor, you will never be able to use the cloth bag for anything else again! Using whatever means is available, strain or lift portions of shredded coconut husk into the bag. Under the correct circumstances (e.g., on the grass in your back yard) you might be able to simply pour the coconut husk into the bag. A little practice will help you determine the optimal amount. Then, twist the mouth of the bag closed and carefully continue twisting the remainder of the bag so as to wring out the excess water. The first time you do this plan on a big mess, perhaps working outdoors or in a garage. After you master the technique a bathtub will suffice, but see the warning in the sidebar.
If you use less water, perhaps half as much, you may not have to wring out the excess, but the soaking time will be extended to overnight, a day, or more. And, there may be lumps of the shredded coconut husk that didn't soak through. These may be sifted out with a French fry basket or merely sorted out by hand. Either resoak them or if you don't need them, put them back in the package and save them for next time.
|
If you ever manage to dump shredded coconut husk into household drains, be very certain to flush it with huge amounts of water for a long time to make sure it clears the system. Otherwise you may have to hire a plumber to unstop or even replace the drain pipes in your home! |
There is seldom any other need to sift shredded coconut husk. Once the shredded coconut husk has been expanded, and possibly any lumps worked out, it may be put into the cage, tamped as densely as practical, and the cage set up as with peat.
Some enthusiasts report that shredded coconut husk does not dry out effectively. The top layer dries out, but the bottom layers may remain damp for extended periods of time. This always raises the possibility of vermin, fungal and bacterial outbreaks. And, forcing your tarantula, especially the desert species, to live on damp substrate is a lot like making you sleep in a wet bed.
The solution to the problem is to merely remove most of the shredded coconut husk and spread it over a wide surface to allow it to dry. Cut open a large, plastic garbage bag and spread it on the basement or garage floor, or on an unused sidewalk in the sun. Spread the shredded coconut husk across it in a thin layer. Do not allow the family cat access to the shredded coconut husk while it is drying lest it be used as a cat pan. Do not attempt to dry shredded coconut husk where other people will be walking lest it be tracked all over the house or the neighborhood. Once it is completely dry it can be returned to the tarantula's cage.
Veteran enthusiasts have learned to prepare two or three times the required amount of shredded coconut husk well in advance of cage cleaning, giving it ample time to dry. We then store the extra dry substrate away in a plastic bag or other container for use next time you need dry substrate.
This may also apply to burrowers that refuse to burrow. Keep in mind, however, that many tarantulas that live in burrows in nature refuse to burrow under any circumstances in captivity. And, we have no clue as to why.
There are several possible reasons why your tarantula hangs from the side of its cage. First, you must realize that in nature the tarantula's world is almost always vertical. Burrowing species most commonly live in a vertically oriented burrow and the arboreal species live in trees. Flat and horizontal is an alien environment to them. But, when we get them as pets, we immediately place them in a cage with a flat and horizontal floor like hamsters, and wonder why they aren't happy. But, they're resilient creatures with a built-in ability to adapt, and they soon come to terms with OUR little idiosyncrasies.
Another reason might be because it doesn't like the substrate. If you've recently changed the substrate it isn't familiar with the new substrate you're using and the place doesn't seem like home anymore. So it's taking the default action and hanging from the cage walls.
Or, if the substrate is still damp, it doesn't like the moisture. Reread But, It won't dry out!
Tarantulas insist on firmly packed substrate. They abhor loose, fluffy stuff that moves under their "feet," or that they sink into. Pack it hard! If your substrate of choice is too friable, you may either have to change to a different substrate, or even mix a little garden loam with your substrate to firm it up. Start with one part by volume of loam to three parts by volume of your favorite substrate. Mix it and test it. Don't be afraid to add more loam if you need to in order to make your substrate firm enough to allow solid footing and a stable burrow.
If you can find organic loam at a health food or "natural and organic" store it's better because of the low pesticide load. If not, serviceable loam is available at most garden and landscaping supplies as well as the garden departments of the larger building supplies.
For burrowers, be sure to use a deeper layer of substrate, a minimum or 1.5 to 2 times the tarantula's diagonal leg span is recommended.
Normally, it'll get over its little snit in a week or so (or when the substrate finally dries out) and return to earth for food and water. If it still hates the substrate it may cover it with a thick layer of silk.
If, after a couple weeks, it's still hanging from the cage walls you should probably change to one of the other substrates. Even then, it may take a few additional days to get over its little hissy fit. Be patient with your tarantula.
There is an ongoing debate about the environmental ethics of using peat versus using coconut husk. While we cannot address that topic here, the interested reader might want to read "SUBSTRATE:" Peat vs. Shredded Coconut Husk.
If you haven't already done so, may we suggest that you read the other webpages listed on the Spiders, Calgary main webpage?
Click the "BACK" button to return to the page from which you came.
Jump to the top of this page.
Jump to the Care and Husbandry of the Chilean Rose Tarantula. webpage.
Jump to the Motorhome webpage.
Jump to the Spiders, Calgary webpage.
Jump to the Index and Table of Contents for this website.
Communicating with us is easy. Just select here.
Copyright © 2012-May-16, Stanley A. Schultz.
Select here for additional copyright information.
This page was initially created on 2012-May-16.
The last revision occurred on 2013-July-03.